Uaz 452 - "Project Loaf"

If your renovating or modifying your vehicle add some details here.

Moderators: Charlesm, KarlJ, zoltan

User avatar
Grommet1
Posts: 516
Joined: Mon Sep 14, 2015 9:46 pm
Location: Barnsley

Re: Uaz 452 - "Project Loaf"

Post by Grommet1 » Sun Feb 28, 2021 10:30 am

Many thanks. I've no excuse not to get on and fit it now 🙂
Cheers
John
Gaz 66 1968
Daimler V8 250 1969
Beetle 1302 1972
Jaguar xk8 1998
Honda CRV 2001
Jaguar X type 2006
Gpz 305 1988
and a lawnmower...

User avatar
Kiplin1995
Posts: 37
Joined: Sun Aug 16, 2020 1:54 pm
Location: Cardiff, UK

Re: Uaz 452 - "Project Loaf"

Post by Kiplin1995 » Mon Apr 12, 2021 6:49 pm

Don't know what happened to March. Work has been crazy recently so has taken over a lot of my time but have been able to make a little progress.


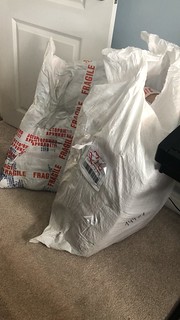
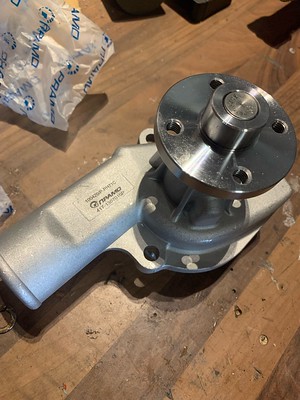
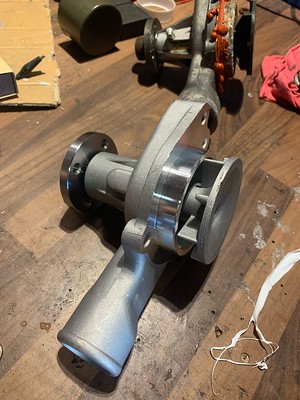
Had a delivery from Aleksander at https://shop.uazbg.com. Really knowledgable guy and always seems happy to give useful advice regardless of whether you're making an order or not so was happy to put some business his way.
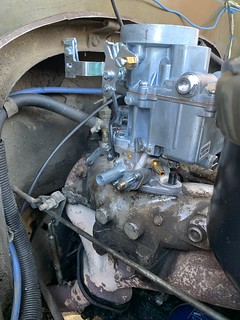
Order consisted of a new parking brake assembly (back plate, shoes, spring etc.), parking brake drum, transfer box flange and seal, couple of new plastic light covers, K131 carb rebuild kit, speedo cable and a nice shiny Uaz badge!

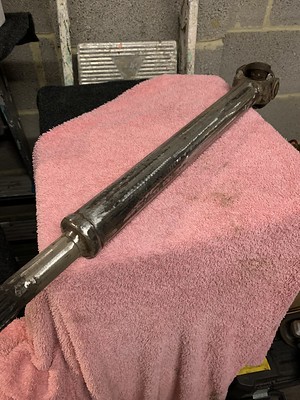
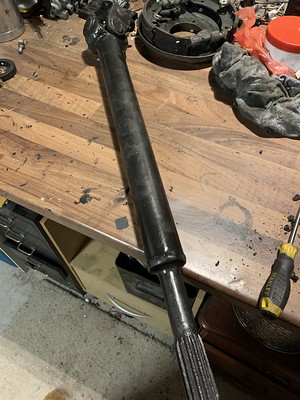
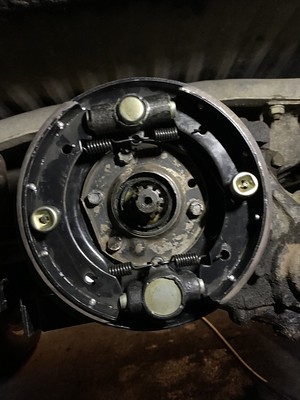
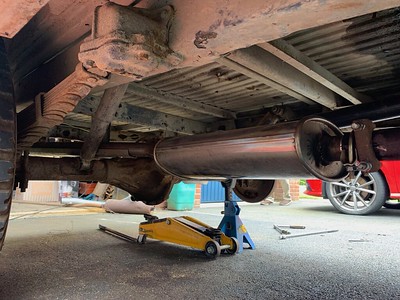
Rear Prop Shaft & Parking Brake

Pretty easy to fit the new stuff. Just a case of a few nuts and bolts so that was done pretty quickly.
Since the prop shaft was off I rubbed it down and sprayed with Hammerite to protect. Greased the splines up and refitted.
Everything seems to be operating correctly. Handbrake holds a lot better than the old one (which I noticed was missing some springs).
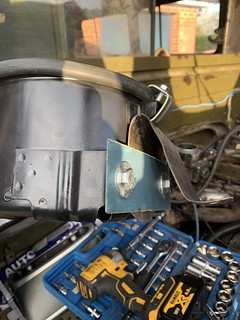
Image ...... Image

Looks good. Hamm-I-Rite? ............................. Old to New

Image ...... Image

Parking brake re-fitted .............................. Ready for action

Fuel Gauge & Pump

Digital gauge fully fitted and was working except it seemed to suggest that the fuel consumption was incredibly good which seemed suspect.
Turns out when I was fiddling with the alternator wiring to improve charging I fried a few things. Gauge was only a cheap Amazon one so will order a new one replace. Sadly the fuel pump also took a hit so had to replace that too. This time with an inline fuse!
On that note I have got a fuse box to fit by the dash such that most things will be fused but I really haven't had the will to deal with the wiring again just yet.


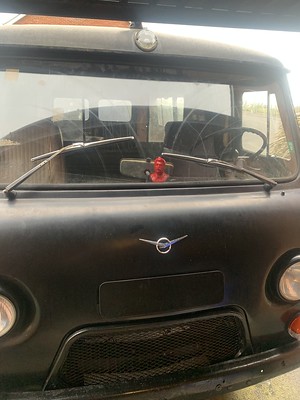
Windscreen wipers and washer

Removed the original wiper motor and mechanism, cleaned up a bit, rewired and refitted. Hardly performing optimally but it does the job so will do for now. I foresee an upgrade here in the future sometime.
Ordered a generic 12v washer pump and bottle from eBay in addition to some adjustable washer jets.
Amazingly there was a cage thing under the passenger side dash that is nearly a perfect fit for the washer bottle so that found its new home easily.
Ran the hoses and wiring through a protective plastic conduit and fitted couple of switches on the dash. All works well.


Found out that you can get classic car bayonet wiper blades on eBay for about a tenner so seemed stupid to mess about with different arms. Ordered some blades and fitted.
Although stupidly ordered 7mm wide fitting instead of 5mm wide. Should have just re-ordered the 5mm ones but decided to heat up the ends of the wiper arms and 'forge' them a couple of mm wider.
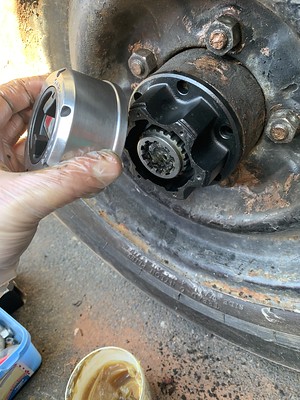


Freewheeling Hubs

The front wheel hubs didn't even match left to right so really wanted to sort that out. Especially as each side was only held in by a handful of bolts.
Easter bank holiday 2020 was spent fitting WARN freewheeling hubs to the Chevy and just a weird coincidence that Easter bank holiday 2021 was spent doing the same to the Uaz.
I had planned to order some from the East but stock and delivery times / costs put me off and I thought I must be able to source some in the UK that would fit.
Measured the bolt pattern in the dark as 6x90mm and started googling. Two options came up close; 6x87.30mm and 6x89.80mm.
Did a few searches on here and looks like Rob, Pete and a few others had been discussing this for Gaz 66 hubs about ten years ago and the AVM410 hubs were mentioned. These were one of the ones that I had found in my own searches so took the risk and ordered them.
They do fit! So again for anyone at the back looking to fit manual freewheeling hubs to a Uaz 452 / 469 you should be able to use AVM410 hubs.

Currently £100/pair on eBay https://www.ebay.co.uk/itm/AVM410-Manua ... 4527056817


Hopefully when you come to do yours you won't be met by the drivers side taking M10 bolts and the passenger side having had the holes tapped out to M12 and double ended stud reducers fitted (M12 to M10) and then secured with nuts. Took a bit of working out and some head scratching at first.
Anyway, managed to find the correct stud reducers on eBay so will cut down to correct length and fit in the next couple of weeks.
For now the hubs are just held in temporarily - not planning on driving it anywhere.


General Electronics

Rewired part of the charging circuit as it was only charging intermittently. Was just crap connections I think so that's now sorted.
Started to put a couple off inline fuses here and there but this will be solved later down the line by fitting the actual fusebox.
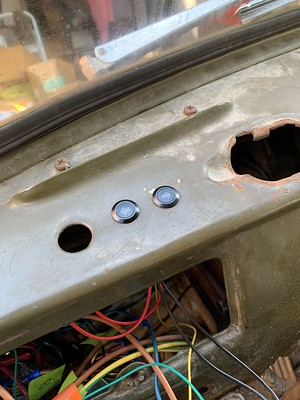
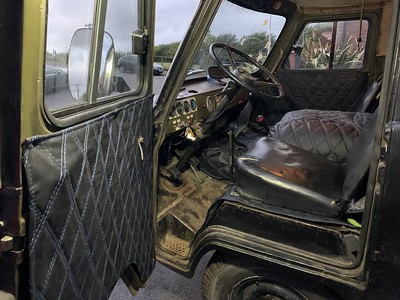
Fitted indicator tell-tale arrows on the dash which I actually really like! Need to do similar for main beam headlight.
Bolted on a fog lamp to the offside of the rear bumper. Not wired up yet but it's there in principle.

Misc

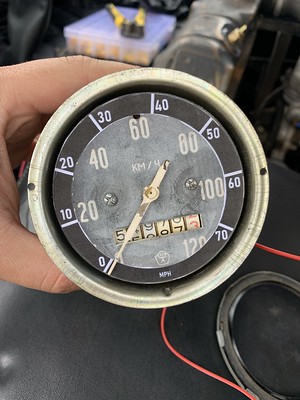
Fitted speedo cable and the speedo appears to work. Compared with GPS and it's surprisingly accurate (especially once you exceed 20KPH).
Adjusted the door catches so they all now latch correctly.
Adjusted the brakes all around - rear near side was definitely always sticking on so glad to get that sorted.
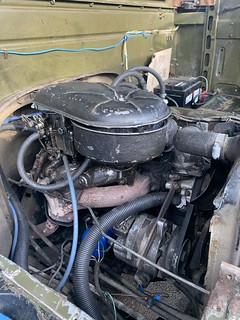
Filled up the air filter oil bath but overfilled... plumes of white smoke! Went for a test drive down a neighbour's farm track but engine kept dying. Turned out the filter element was so saturated with oil that it was choking the engine so removed the filter for the day. Only a short track so couldn't get up to any speed but easily hit 48KPH / 30MPH.
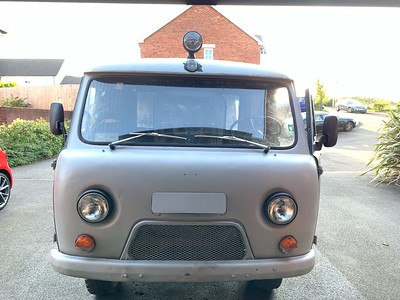
All new light covers fitted and Uaz badge put on the front. Starting to look a little more sensible.
Adjusted ignition timing again and its definitely getting better.

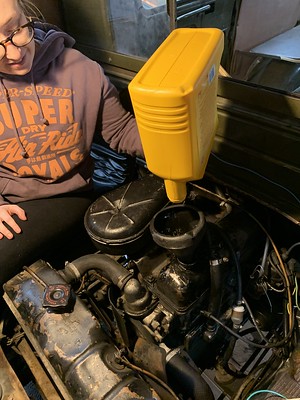
Herself ventured out now the weather is improving and did her first oil change!
To my future self: the oil you used was Shell Helix 15W-40 HX5 Mineral.


Facebook Uaz mate Jules found a Russian site that some of you may know about but was new to me: https://spectuninguaz.ru.
Prices are all v cheap as you'd expect. We've put together an order of about £450 and the total delivery has only come to about £150.
Sure we will have to pay taxes upon import but bulk ordering together may be the way forward!

Will update once parts have arrived but as a teaser, some things we ordered;
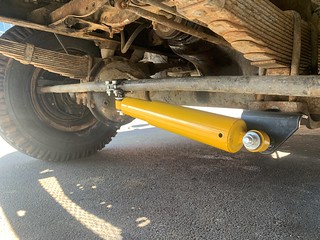
  • Steering dampers
  • New air filter that isn't soaked in oil
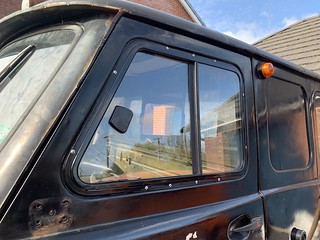
  • Sliding windows for front doors
  • Big convex wing mirrors
  • Some spares such as brake shoes, adjusters, throttle & choke rods etc. etc.
(Most items were x2 and there was a fair bit more than this but all smaller stuff that added up - plus some extras for Jules. £450 really was a good deal!)
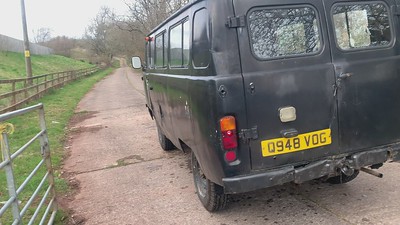
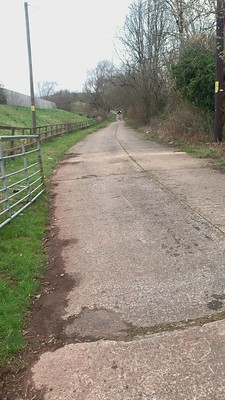
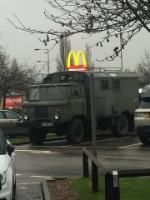


Test Drive

Ignore the number plate. That was borrowed for reasons.
All footage is on private land might I add! Click on the images to see video footage.


Looking back now it seems like I actually managed to get a fair amount done during March.
Probably not much more to report on until after the Russian delivery has taken place which will be at least a couple of weeks I suspect.


Cheers,
Matt
Uaz 452 - 1983 ex Bulgarian Ambulance
Chevrolet Blazer - 1984 ex US Airforce

Gareth
Posts: 125
Joined: Sun Dec 25, 2016 9:22 pm
Contact:

Re: Uaz 452 - "Project Loaf"

Post by Gareth » Tue Apr 13, 2021 7:12 am

Very interesting, good inspiration! :)

User avatar
portamurda1
Posts: 2182
Joined: Thu Jan 14, 2010 10:17 pm
Location: W/N Yorkshire border

Re: Uaz 452 - "Project Loaf"

Post by portamurda1 » Tue Apr 13, 2021 6:53 pm

You’ve been busy...and thorough
Hotchkiss 12-2 (Kurz)
Panda 4x4s ‘fousands of em’
Jeep Renegade
Jeep Cherokee
Iveco 4x4
And agricultural stuff

User avatar
Kiplin1995
Posts: 37
Joined: Sun Aug 16, 2020 1:54 pm
Location: Cardiff, UK

Re: Uaz 452 - "Project Loaf"

Post by Kiplin1995 » Fri Aug 20, 2021 8:19 pm

Got a bit busy in work so Uaz activities were a bit more sporadic than usual.
Then time leapt past and I realised I kept forgetting / putting off posting updates.

Have plenty to report on now so will split progress across a few posts.


Radiation Check

It dawned on me that it would be a wise move to do a quick check for radiation given that we're talking 80s Soviet technology.
Happened to have an East German Geiger counter in the garage (don't we all?). Turns out we're safe but I enjoyed giving the neighbours a scare.


SpecTuningUaz Delivery

Shortly after my last post the Russian delivery from SpecTuningUaz arrived with Jules down in Portmouth-ish.
Amazingly not a single scratch on anything but DPD managed to smash a wingmirror en-route to Cardiff :clap:


Windows

First job in May was to attack the windows.
Following some advice from the Uaz 452 Facebook group I silicon-ed and rivetted from the outside and they went in with relative ease.

Please forgive the un-even rivet spacing... I was re-using holes made from drilling out the old spot-welds.

Air Filter

Out with the old:
And in with the new:


The new air filter came with a fabric 'sock' type thing that was sat within the filter housing around a metal colander-type arrangement.
I assume this is a washable filter and was not just there for storage/shipment? Would anyone care to offer an opinion? (Can just about be seen in the pics under the carburettor section below.


Wheel Hubs

Had a few more difficulties with those thread reducers so said "sod it" and bought all the kit for a complete wheel hub re-build. Everything from the flange at the back, new wheel studs, wheel hub, bearings, seals etc.
Only did this on the one side that was being problematic for now but with hindsight I should have doubled up and done both. Will do this in near future probably.

Steering Damper

Pretty uneventful install of the steering damper.
Oh, except I fitted it 'upside down' and ballsed up the nylock nuts.
Both rectified now but not pictured.


Wing Mirrors

Ordered another set of wing-mirrors from Aleks at UazBG and got shipped to a friend's house in Poland who happened to be travelling to the UK in July so she was able to smuggle some parts in for me.


Carburettor

I'd previously ordered a carb re-build kit but after Jules reported slight disaster doing his I chickened out and bought a whole new carb.
I wanted to do this at some point down the line anyway as some butcher had drilled and tapped holes in the old one to fit spigots for the LPG system.

So glad I did this as the new K131A has worked wonders with how smoothly the Uaz runs.


Plenty more to follow! Will try to post over the weekend :)
Spoiler: Includes MOT related activities. (not yet on the road so don't get too excited)
Matt
Uaz 452 - 1983 ex Bulgarian Ambulance
Chevrolet Blazer - 1984 ex US Airforce

User avatar
Kiplin1995
Posts: 37
Joined: Sun Aug 16, 2020 1:54 pm
Location: Cardiff, UK

Re: Uaz 452 - "Project Loaf"

Post by Kiplin1995 » Sat Aug 21, 2021 9:50 pm

...continued...


Headlamps

Met Danny (chosen man) at Evesham a few weeks back and got talking about all things Uaz whilst admiring his 469.
Realised I hadn't swapped my headlamps over to RHD whilst looking at his so ordered some sealed beam units on eBay.
Probably not best quality and may well break in future but tbh seem decent, especially for only about £30/pair. Will likely upgrade to LED units later down the line but very happy with the plug'n'play compatibility.


Seats

Had been trying to get hold of some old style original seats but they're like rocking horse shit and expensive with it.
Luckily a post on FB came up trumps. Took a drive down to Somerset and met another 452 owner - Harry.
As well as the seats he sold me I was able to rummage through his spares department and came away with some goodies.

Really pleased now the seats are in - the cab is slowly taking shape and looking a tad more sensible.

Also made up some brackets that secure the seats in place for MOT purposes - not seen in the photos but they're barely noticeable anyway.

Engine Cover / Hood

The engine cover had been rattling like a barsteward so wanted to fit some sound deadening mats but needed to clean it up first so that they stuck.
Decided to grind the underside down and re-spray before fitting the mats. I chose not to break the bank on super-duper branded mats and managed to pick up a pack of 30 for £27 on eBay and I'm well-impressed.
They have made a massive difference and I believe are also helping to stop so much heat penetrating into the cab.


Onlyfans

Bought some really tacky 12v fans on eBay but am actually quite happy with them B-)
Driver & passenger very effectively cooled from them and they are discretely fitted above windscreen. Although I suspect on hotter days we will just end up turbocharging hot air into our faces but hey-ho.


Interior Trim

Bought an interior trim kit from the guy that sold me the Uaz in The Netherlands so got that fitted to tie in with the seats and sound-deadening.
Possibly slightly OTT but am quite pleased. Makes it look less scrap-yard worthy.

Above photos were during fitting process - have since cut slots for the door handles etc.


Speedo

After reading some posts on here it looked as if a MPH speedo would be needed for the MOT.
Looks like some of you have painted markers around the outside or put stick-on lines to reflect MPH marks.

I went a little further...
Took a photo of the KPH gauge with a measuring tape held up against it and loaded into Paint.Net.
This then allowed me to 'calibrate' the image size so that 1cm=1cm etc.

Measured the angles between KPH marks and then did the conversion to find out what angle was equivalent to 1 MPH.
Then drew out the lines for 10MPH increments and prettied it up a little.
Only thing I didn't really consider was how shit domestic printers are so when I clicked print it didn't come out to scale after all. Trial and error with print scales got me there though.
If anyone wants the file you can find it attached to this post - I printed at 17% scale and cut it out. Help yourselves!


Hazards

Wired up the hazard switch that I bought MONTHS ago:


Don't think this is an MOT requirement but I figured I'd be using them fairly regularly so probably a wise move.
Switch has since been fitted into dash.


One last update to go before we're caught up :)
Attachments
speedo_white_on_black.png
speedo_white_on_black.png (14.95 KiB) Viewed 680 times
Matt
Uaz 452 - 1983 ex Bulgarian Ambulance
Chevrolet Blazer - 1984 ex US Airforce

User avatar
Potemkin
Posts: 165
Joined: Sun Dec 15, 2013 11:15 am
Contact:

Re: Uaz 452 - "Project Loaf"

Post by Potemkin » Sun Aug 22, 2021 7:40 pm

You're doing a fantastic job there almost makes me want another 452
Gaz 67b (1945)
Gaz 51A (1957)
Gaz 69 (1958)
Ford AA truck (1929)
BA64 (1943)
Gaz 66 (1979)
Dnepr motor cycle combi (1964)


10th Guard army re enactment group
IMPS and MVT[/i]

User avatar
Kiplin1995
Posts: 37
Joined: Sun Aug 16, 2020 1:54 pm
Location: Cardiff, UK

Re: Uaz 452 - "Project Loaf"

Post by Kiplin1995 » Thu Apr 07, 2022 9:04 pm

Yes I'm aware it's been 7 months and I could make some joke about a delay with DVLA but in reality things have moved on a lot since then. I've just been too busy (lazy?) to post about it.

Picking up where we left off, final stages of MOT prep.

MOT-Ready?

At this point I had done all the work I could think of that would be required for MOT so had it booked in for a pre-test.
Dropped it off and waited anxiously. The list that came back was surprisingly short. Wheel bearings needed some attention on the side that I had replaced the wheel hub, brakes needed adjusting, parking brake wasn't secure, the amount of oil leaking was deemed "too much" and (as I was aware) the exhaust needed looking at.

Exhaust

There was a serious amount of exhaust blow from the rear box backwards. So I cut that off and mashed together a hybrid with a left over stainless box and pipe from a scrap van.
Plenty of exhaust putty and job was a good'un.

Image ........ Image
Exhaust ........ Exhaust


Primed to go

Mrs Loaf wanted some input so we got the spray-gun out, cleaned the front face up and put down a coat of grey primer.
I actually quite liked it this colour but apparently it has to be green eventually.

Image ........ Image

Once you go black ........ You go grey


Going Green

Ordered some RAL6014 from Paints4Trade.com. Specifically: "Military Vehicle Paint - Sheen Level:Satin, Pack Size:5 Ltrs Colour Required: RAL 6014 Yellow olive".

This gave us a real feel for what the finished product will look like but not doing the rest of the body until I get a chance to clean up some of the body work. The bumper will be black at the end too.


Oil Sump

There was a non-negligible leak around the sump so I removed and cleaned it up. Got a bit carried away with a rogue can of spray paint in the garage so it is now pea-green. (Once it's faded some it will actually be quite close to that Russian pea-green you sometimes see Zils etc. in).
Went for an RTV gasket but that turned out to be not such a great idea. More to follow on this in a later post but it did stop the leaks enough for the time being.


Image ........ Image
Before ........ After

Image ........ Image
RTV Gasket ........ Fitted


Water Pump

So it was going quite well until I had it booked in for a real MOT. On the way to the garage all hell broke loose.
The throttle got stuck on at about 80% and I could not for the life of me work out how and why which meant I had to drive it home on full throttle which was exciting.
Nearly home and I started hearing some very interesting noises coming from the engine bay. I was convinced I'd bent some rods, it was really awful.
Killed the engine as I approached a junction and then couldn't start it again.
Managed to push it onto the main road which happens to be on a hill (luckily I needed to go downwards) and rolled it home onto the drive. Half an hour later I noticed a big puddle of water underneath.
I went to bed and gave up on it for a few weeks I think.

Turns out it really wasn't all that bad. A tiny screw on the carburettor had wound itself all the way in (or out) which was causing the high throttle.
One of the alternator bracket bolts had also come loose and the alternator was jiggling around all over the place being hit by the fan blades (this was the horrible clanging noise I could hear). This in turn must have put some stress on the water pump which decided it preferred life as a colander.

Anyway, tried removing the water pump and applying RTV gasket but it turns out the pump was beyond repair so ordered a new shiny one which is much better quality than the old anyway. Proper gasket fitted and no leaks so far!


Got there in the end!

More to follow but heading in the right direction.
Matt
Uaz 452 - 1983 ex Bulgarian Ambulance
Chevrolet Blazer - 1984 ex US Airforce

Post Reply